
The short answer
To tie a tie, start with the wide end on your right, hanging lower than the narrow end. For a four-in-hand, the most useful knot: cross the wide end over the narrow end, bring it behind, cross it over the front again, bring it up through the neck loop from underneath, then tuck it down through the front band. Slide the knot up until it covers your collar button.
- Learn the four-in-hand first: five moves, and it suits most collars and ties.
- Match knot size to the collar: small knots for point and button-down collars, broader knots for spread and cutaway collars.
- Thick ties need small knots; thin ties need bigger ones.
- The tip should touch the top of your belt buckle. If it misses, move your starting point by the same amount.
- The simple knot, Kelvin and Pratt start with the tie inside out (seam facing out).
- Pinch a dimple just below the knot before you pull it tight.
In this guide
- Before you start: how to read the steps
- How far should the wide end hang at the start?
- How to tie a four-in-hand knot
- How to tie a half Windsor knot
- How to tie a Windsor knot (full Windsor)
- How to tie a Pratt (Shelby) knot
- How to tie a Kelvin knot
- How to tie a simple (oriental) knot
- Tie knot comparison: size, shape and difficulty
- How to choose a tie knot
- How to get a dimple in your tie
- How long should your tie be?
- Common tie-tying mistakes and how to fix them
- What about the Eldredge, Trinity and other fancy knots?
- The tailor's view: collars, ties and knots that work together
- Questions people ask
Learning how to tie a tie means learning one motion in a few different orders. The wide end wraps around the narrow end and the loop around your neck, then tucks down through a band at the front. Change the order and the number of wraps and you change the size and shape of the knot.
In 1999 two Cambridge physicists, Thomas Fink and Yong Mao, used a mathematical model to count 85 ways to tie a conventional tie knot. Most are lopsided, bulky or both. The six below are the ones worth knowing, and most men need only two of them: a four-in-hand for narrow collars and a half Windsor for spread collars.
The six knots at a glance
- Learn first
- Four-in-hand: five moves, suits most collars and ties
- Easiest
- Simple (oriental) knot: four moves, starts inside out
- Best all-rounder for spread collars
- Half Windsor
- Largest and most symmetrical
- Full Windsor, for spread and cutaway collars
- Neat medium knot that starts inside out
- Pratt (Shelby)
- A fuller four-in-hand
- Kelvin
- Where the tip lands
- At the waistband, touching the top of the belt buckle
Before you start: how to read the steps
Every set of steps on this page uses the terms below. Learn them once and each sequence reads cleanly.
- Left and right always mean your own left and right. Facing a mirror, your right hand appears on the right side of the reflection, so the words match what you see.
- Wide end (the blade) is the broad end that finishes in front. Narrow end (the tail) hangs behind it.
- Neck loop is the loop of tie around your neck, above the point where the two ends cross.
- Front band (sometimes called the front loop) is the horizontal wrap across the front of the knot. Every knot here finishes by passing the wide end down through it.
- Seam in means the back of the tie, where you can see the seam and label, faces your shirt. Seam out means the tie hangs inside out at the start; the wrapping turns it the right way round.
- Fasten your top button and turn your collar up before you begin. Fold it down once the knot is tight.
How far should the wide end hang at the start?
The wide end always starts lower than the narrow end, because the knot is made entirely from the wide end while the narrow end stays still. The bigger the knot, the more of the wide end it uses, so the higher the narrow end has to start. With a standard tie, a four-in-hand usually works with the narrow end's tip starting somewhere between the bottom of your breastbone and your navel. A full Windsor needs it to start much higher, often around mid-chest.
Uses the most tie
Full Windsor
Start the narrow end highest
Half Windsor
Pratt and Kelvin
About the same as each other
Four-in-hand
Simple (oriental)
Start the narrow end lowest
Uses the least tie
How to tie a four-in-hand knot
The four-in-hand is a small, narrow knot that leans slightly to one side. It is the most useful knot you can learn: it suits point and button-down collars, thick and thin ties, and any office. Our four-in-hand guide covers fixes, the dimple and when it is formal enough.
Four-in-hand: start seam in
- 1
Set up
With your collar up, drape the tie around your neck seam in, wide end on your right and hanging well below the narrow end.
- 2
Cross over
Cross the wide end over the front of the narrow end, from right to left.
- 3
Wrap behind
Bring the wide end behind the narrow end, back to the right.
- 4
Cross over again
Bring the wide end across the front again, from right to left. This horizontal wrap is the front band.
Tip: Slip your left index finger under the front band to keep it open for the last move.
- 5
Up through the neck loop
Bring the wide end up behind the knot and through the neck loop from underneath, so the tip comes out at the top.
- 6
Down through the front band
Pass the wide end down through the front band, in front of the narrow end.
- 7
Tighten
Hold the narrow end below the knot and slide the knot up to your collar with the other hand. Pinch a dimple as it tightens, then fold the collar down.
How to tie a half Windsor knot
The half Windsor is a medium-sized, near-symmetrical triangle. It fills a semi-spread or spread collar better than a four-in-hand and is the safest all-round business knot. One pass over the neck loop is what sets it apart. See the half Windsor guide for collars and fixes.
Half Windsor: start seam in
- 1
Set up
Drape the tie seam in, wide end on your right. Start the narrow end a few inches higher than you would for a four-in-hand.
- 2
Cross over
Cross the wide end over the narrow end, from right to left.
- 3
Wrap behind
Bring the wide end behind the narrow end, back to the right. The back of the tie now faces out; that is correct.
- 4
Over and through the neck loop
Bring the wide end up in front, over the top of the neck loop, and down through the loop. Pull it out on your left.
Tip: It must come out on your left. If it comes out on your right, the next move goes the wrong way.
- 5
Across the front
Bring the wide end across the front of the knot, from left to right. This is the front band, and the right side of the tie now faces out.
- 6
Up through the neck loop
Bring the wide end up behind the knot and through the neck loop from underneath.
- 7
Down through the front band
Pass the wide end down through the front band.
- 8
Tighten
Hold the narrow end, slide the knot up and pull the wide end straight down so the triangle sits level.
How to tie a Windsor knot (full Windsor)
The full Windsor, also called the double Windsor, wraps each side of the neck loop to build a broad, symmetrical triangle. It needs a spread or cutaway collar, suits thin to medium ties, and uses the most length of any knot here. The Windsor knot guide explains when it is too big.
Full Windsor: start seam in
- 1
Set up
Drape the tie seam in, wide end on your right. Start the narrow end much higher than for a four-in-hand, around mid-chest.
- 2
Cross over
Cross the wide end over the narrow end, from right to left.
- 3
Up through the neck loop
Bring the wide end up behind the crossing and through the neck loop from underneath.
- 4
Down on the left
Bring it down in front on your left side. The wide end has now wrapped the left side of the neck loop.
- 5
Behind to the right
Take the wide end behind the narrow end, across to your right.
- 6
Over and down on the right
Bring the wide end up in front, over the right side of the neck loop, and down through the loop so it comes out on your right. The back of the tie now faces out.
Tip: Keep both side wraps snug and even; they set the width of the finished triangle.
- 7
Across the front
Bring the wide end across the front, from right to left. This is the front band.
- 8
Up through the neck loop
Bring the wide end up behind the knot and through the neck loop from underneath.
- 9
Down through the front band
Pass the wide end down through the front band.
- 10
Tighten
Slide the knot up evenly, nudging each side so the triangle is level and fills the collar.
How to tie a Pratt (Shelby) knot
The Pratt is a neat, medium, fairly symmetrical knot, larger than a four-in-hand and smaller than a half Windsor. It starts inside out and uses less length than a half Windsor, which helps tall men who want more than a four-in-hand. It is usually credited to Jerry Pratt of the US Chamber of Commerce, and it is also called the Shelby after the American television newsman Don Shelby, who is said to have made it widely known by wearing it on air in the late 1980s.
Pratt: start seam out
- 1
Set up
Drape the tie inside out, with the seam facing away from your shirt and the wide end on your right.
- 2
Cross under
Cross the wide end behind the narrow end, from right to left.
- 3
Over and through the neck loop
Bring the wide end up in front, over the top of the neck loop, and down through the loop. Pull it down on your left and snug it against the knot.
Tip: Pull this wrap firm. A loose wrap here makes a knot that sags.
- 4
Across the front
Bring the wide end across the front, from left to right. The right side of the tie now faces out.
- 5
Up through the neck loop
Bring the wide end up behind the knot and through the neck loop from underneath.
- 6
Down through the front band
Pass the wide end down through the front band.
- 7
Tighten
Hold the narrow end and slide the knot up. The finished knot should show no seam.
How to tie a Kelvin knot
The Kelvin is a four-in-hand with an extra turn, tied from inside out. It is slightly larger and fuller than a four-in-hand but keeps the same long shape, which helps a thin tie fill a point or semi-spread collar. Its name honors the physicist Lord Kelvin.
Kelvin: start seam out
- 1
Set up
Drape the tie inside out, seam facing away from your shirt, wide end on your right.
- 2
Cross under
Cross the wide end behind the narrow end, from right to left.
- 3
Across the front
Bring the wide end across the front, from left to right.
- 4
Under again
Take the wide end behind the narrow end again, from right to left.
- 5
Across the front again
Bring the wide end across the front again, from left to right, over the first wrap. This outer wrap is your front band.
- 6
Up through the neck loop
Bring the wide end up behind the knot and through the neck loop from underneath.
- 7
Down through the front band
Pass the wide end down through the outer front band only.
Tip: Hold the outer band open with a finger so the wide end does not slip under both wraps.
- 8
Tighten
Slide the knot up while holding the narrow end.
How to tie a simple (oriental) knot
The simple knot, also called the oriental or small knot, is the smallest and quickest knot: four moves, starting inside out. It suits thick ties in wool, knit or heavily lined silk, narrow collars, and tall men whose ties land short with bigger knots. Be aware that some people use the name simple knot for the four-in-hand. Our easiest tie knot guide covers it in full.
Simple knot: start seam out
- 1
Set up
Drape the tie inside out, seam facing away from your shirt, wide end on your right. It needs the least length of any knot, so start the narrow end low.
- 2
Cross under
Cross the wide end behind the narrow end, from right to left.
- 3
Across the front
Bring the wide end across the front, from left to right. This is the front band, and the right side of the tie now faces out.
- 4
Up through the neck loop
Bring the wide end up behind the knot and through the neck loop from underneath.
- 5
Down through the front band
Pass the wide end down through the front band.
- 6
Tighten
Hold the narrow end and slide the knot up firmly. A small knot looks best when it is tight.
Tie knot comparison: size, shape and difficulty
| Knot | Size | Shape | Difficulty | Starts | Best collars | Best for |
|---|---|---|---|---|---|---|
| Simple (oriental) | Smallest | Narrow, slightly asymmetric | Very easy | Seam out | Point, button-down | Thick ties, tall men, casual outfits |
| Four-in-hand | Small | Long, asymmetric | Easy | Seam in | Point, button-down, semi-spread | Everyday business, most ties |
| Kelvin | Small to medium | Long, fuller than a four-in-hand | Easy | Seam out | Point, button-down, semi-spread | Thin ties that need more knot |
| Pratt (Shelby) | Medium | Neat, fairly symmetrical | Moderate | Seam out | Semi-spread, spread | Business, interviews, tall men |
| Half Windsor | Medium | Near-symmetrical triangle | Moderate | Seam in | Semi-spread, spread, cutaway | Business, interviews, weddings |
| Full Windsor | Large | Broad, symmetrical triangle | Harder | Seam in | Spread, cutaway | Formal events, thin ties, wide collars |
Size assumes a medium-weight silk tie. A thick tie makes every knot larger; a thin one makes it smaller.
How to choose a tie knot
Choose the knot that fills the space between your collar points without forcing them apart. Then adjust for the tie, your build and the occasion. Our guide to which tie knot to wear goes through each decision in detail.
By collar
The collar decides first. A point collar has a narrow gap between its points and wants a small knot; a cutaway has a wide gap and needs a broad one. If you are not sure what you are wearing, our guide to shirt collar types shows each one.
| Point | Button-down | Semi-spread | Spread | Cutaway | |
|---|---|---|---|---|---|
| Simple | |||||
| Four-in-hand | |||||
| Kelvin | |||||
| Pratt | |||||
| Half Windsor | |||||
| Full Windsor |
By tie thickness
Thickness matters as much as the collar. A heavy wool, knitted or thickly lined silk tie makes a big knot from few wraps, so tie a simple knot or four-in-hand. A thin, lightly lined silk tie makes a small knot, so a half Windsor or full Windsor gives it presence. Skinny ties under about 2¼ inches (6 cm) look best with a four-in-hand; a broad knot on a narrow blade looks top-heavy.
By face, build and height
Keep the knot in proportion to you. A broad face, thick neck or large frame can carry a half Windsor or full Windsor; a narrow face and slim neck look better with a four-in-hand, Kelvin or Pratt. Height affects length more than looks. Tall men should favor knots that use less tie, while shorter men can use a bigger knot to take up spare length.
By occasion
| Occasion | Good choices | Why |
|---|---|---|
| Job interview or client meeting | Half Windsor with a spread collar; four-in-hand with a point collar | Neat and conventional; nothing draws the eye |
| Everyday office | Four-in-hand, Kelvin or Pratt | Quick to tie and suits most shirts |
| Wedding, ceremony or formal day event | Half Windsor or full Windsor with a spread collar | A fuller knot reads as more formal |
| Funeral | Four-in-hand or half Windsor in a dark tie | Understated and tidy |
| Casual: knit tie, button-down, odd jacket | Four-in-hand or simple knot | Small knots suit relaxed ties and collars |
How to get a dimple in your tie
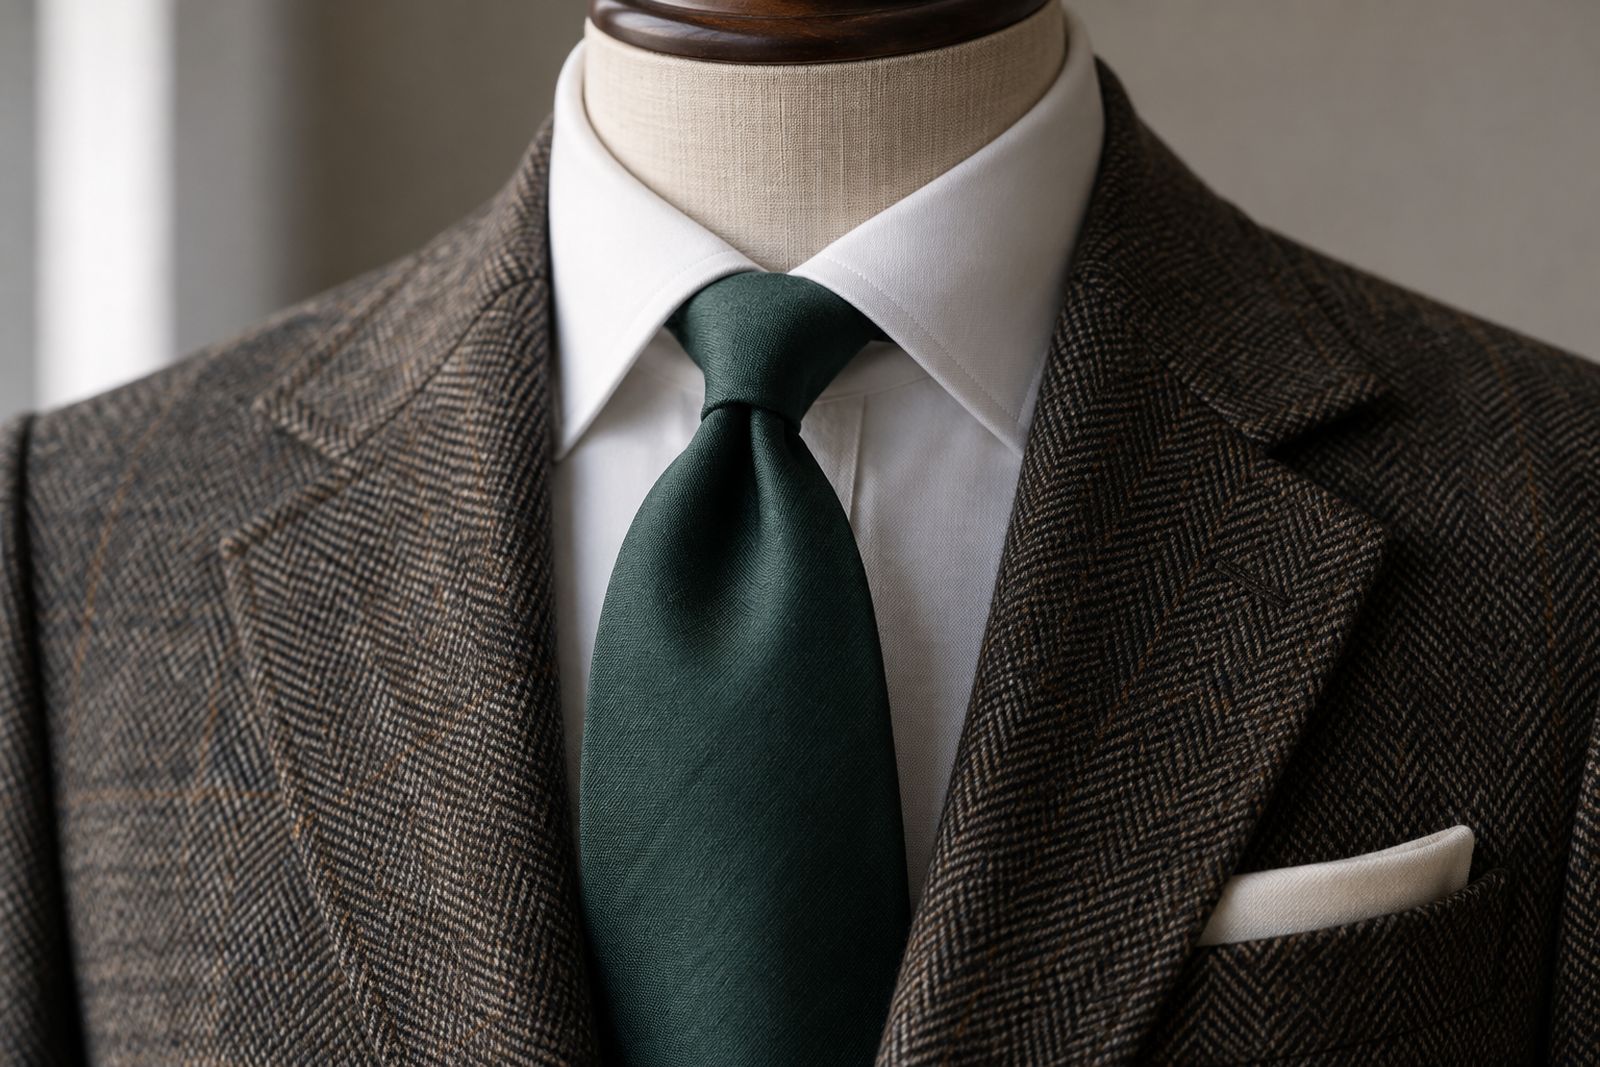
A dimple is the small fold in the blade just below the knot. It makes the tie arch slightly away from the shirt and shows the knot was tied with care. You form it at the very end, before the knot is tight.
- 1
Stop before tightening
After passing the wide end down through the front band, leave the knot loose.
- 2
Press in the crease
Push your index finger into the middle of the blade just under the knot, and squeeze the two edges of the blade forward with your thumb and middle finger.
- 3
Tighten around it
Keep the crease pinched while you pull the wide end down and slide the knot up with your other hand. Let go once the knot is snug.
Tip: One centered dimple is the norm. Thin or slippery ties may not hold one; heavier silk and grenadine hold it well.
How long should your tie be?
The tip of the wide end should reach your waistband, touching the top of your belt buckle. Standard ties are about 57 to 58 inches (145 to 148 cm) long, which suits most men with most knots. Extra-long ties of about 61 to 63 inches (155 to 160 cm) suit tall men, larger necks and anyone who ties a full Windsor. The narrow end should finish shorter than the wide end and sit in the keeper loop on the back of the blade. Our tie length guide has a chart by height and knot, and our tie width guide shows how to match the blade to your lapels.
Common tie-tying mistakes and how to fix them
| Problem | Usual cause | Fix |
|---|---|---|
| Tip stops above the waistband | Wide end started too high, or the knot is too big for the tie | Start the wide end lower by the amount you missed, or use a smaller knot |
| Tip hangs below the belt | Wide end started too low | Start it higher by the amount of the overshoot |
| Narrow end hangs below the wide end | Tie too long for your height and knot | Use a bigger knot and start the narrow end higher |
| Seam shows on the finished knot | Wrong starting side for that knot | Four-in-hand, half Windsor and Windsor start seam in; simple, Kelvin and Pratt start seam out |
| Gap between knot and collar | Knot not pushed fully up | Hold the narrow end and slide the knot up until it covers the collar button |
| Collar points lift or splay | Knot too big for the collar | Use a smaller knot or a thinner tie |
| Tie shows above the collar at the back | Collar not fully folded or tie twisted at the neck | Fold the collar down and run a finger around it to seat the tie |
| Knot leans to one side | The four-in-hand's natural shape, or uneven tightening | Pull the wide end straight down; switch to a Pratt or half Windsor if you want symmetry |
What about the Eldredge, Trinity and other fancy knots?
The Eldredge and Trinity are decorative knots tied with the narrow end, producing braided and three-lobed shapes. They take practice, use a lot of tie and draw attention to themselves. They can work at a party or with a casual outfit, but at an interview, a funeral or a business meeting the six knots above are the right choice.
The tailor's view: collars, ties and knots that work together
A good shirtmaker cuts the collar around the knot you wear. The gap between the two halves of the collar at the neckband, called the tie space, should be just wide enough for the knot to sit in without pushing the collar points apart or leaving a gap above the knot. If you order made-to-measure or bespoke shirts, tell the maker which knot you tie and how thick your ties are.
Ties can also be made to length. Made-to-order ties can be cut longer or shorter than standard, and a tie specialist can shorten a ready-made tie by taking it apart and re-making it. A ready-made tie can rarely be lengthened, so tall men should buy extra-long from the start. For black tie, the knot changes entirely: see how to tie a bow tie.
What a good tailor checks when you wear a tie
- The knot fills the tie space and covers the collar button
- The collar points lie flat on the shirt or just touch the tie
- The tie is hidden under the collar all the way round
- The tip of the wide end lands at the waistband
- The blade's width is close to the lapel's width at its widest point
- The narrow end is shorter than the wide end and held by the keeper loop
Start with the four-in-hand and tie it until you no longer need the steps, then add the half Windsor for spread collars. Those two cover almost every collar and occasion. When the knot is right, pair the tie with the right shirt and suit using our guide to matching a tie to your shirt and suit.
Questions people ask
What is the easiest tie knot?
The simple knot, also called the oriental knot, is the easiest: four moves, starting with the tie inside out. The four-in-hand is almost as easy and is the better first knot, because it suits more collars and ties. Both make small knots, so they work best with point and button-down collars.
Which tie knot is most professional?
The four-in-hand and the half Windsor are both fully professional. Choose by collar: a four-in-hand for point and button-down collars, a half Windsor for semi-spread and spread collars. What looks unprofessional is a knot that is loose, crooked or the wrong size for the collar, not the knot itself.
How do you tie a tie step by step as a beginner?
Learn the four-in-hand first. With the wide end on your right and hanging lower: cross it over the narrow end, wrap it behind, cross it over the front again, bring it up through the neck loop from underneath and tuck it down through the front band. Tie it ten times in a row and the moves become automatic.
Why does my tie always end up too short?
The wide end started too high for the knot you tied. Untie it and start with the wide end lower by however far the tip missed your belt. If that leaves the narrow end too short to reach the keeper loop, use a smaller knot or buy extra-long ties.
Which way should the seam face when you start?
For the four-in-hand, half Windsor and full Windsor, start seam in, with the back of the tie against your shirt. For the simple knot, Kelvin and Pratt, start seam out, with the tie inside out; the wrapping turns it the right way round. Starting the wrong way leaves the seam showing on the finished knot.
Do left-handed people tie a tie differently?
They can follow the same steps, or mirror them by starting with the wide end on the left and swapping every left and right in the instructions. Both versions give the same knot in mirror image. Nobody looking at the finished knot can tell which hand tied it.
How tight should a tie knot be?
Tight enough that the knot covers the collar button and stays there all day, with no gap between the knot and the collar. You should still be able to turn your head comfortably. If the collar itself feels tight, the problem is the shirt's neck size, not the knot.
Where should a tie bar go?
A tie bar usually sits between the third and fourth buttons of the shirt, clipping the tie to the placket. It should be narrower than the tie, roughly three quarters of its width. A bar wider than the tie looks like a mistake.
TailorGuide is independent. Our guides are written and checked by our team and carry no paid endorsements. How we work.